
Open: 24 hours
1430 E Borchard Ave, Santa Ana, CA 92705
© 2025 White Glove Plumbing

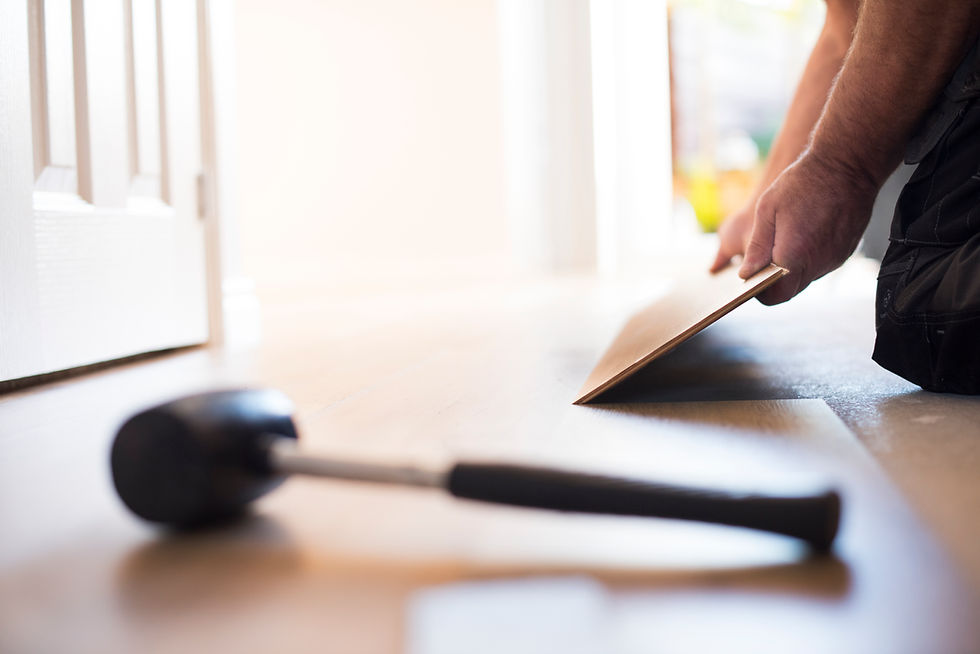
Wood & Vinyl Flooring Installation in Orange County, CA
Flooring is the finish you live on every day—so substrate prep, moisture control, and expansion details matter as much as the plank you pick. White Glove Plumbing & Restoration provides professional wood & vinyl flooring installation for homes, multi-family, and commercial spaces—correcting substrates, managing moisture, and installing per manufacturer/spec to protect your investment and warranty.
✓ Substrate first: Flatten, level, and dry to spec before planks.
✓ Quiet & solid: Proper underlayments, transitions, and trims.
✓ Clean finish: Tight lines, movement joints, and neat edges.
✓ Moisture managed: Testing, barriers, and adhesives that match the slab.
✓ Substrate first
✓ Quiet & solid
✓ Clean finish
✓ Moisture managed


What Is Wood & Vinyl Flooring Installation?
A specification-led process that starts with subfloor evaluation and moisture verification, moves through prep (flatten/level, patches, underlayment), and ends with a clean, warrantable installation—including base/trim, transitions, and a neat punch list.
We install engineered wood (glue, float, nail/staple per substrate) and resilient vinyl systems (LVP/LVT/SPC/WPC) with the right underlayment or adhesive.
Why Choose White Glove Plumbing
Cause-to-cure continuity: If a prior leak/slab moisture caused damage, we fix the source, document dry-down, and rebuild—one team.
Standards-driven install: ASTM/ACI moisture testing, flatness corrections, manufacturer-approved adhesives/underlayments, and expansion gaps.
Occupied-space pros: Phased areas, dust control, HEPA air support, and clean egress for families, offices, and retail.
Insurance fluent: Like-kind replacements separated from owner upgrades with clear, line-item estimates.

Immediate Actions (What to Do Now)
Avoid purchasing materials before we verify substrate conditions (flatness/RH).
If replacing after water damage, retain mitigation docs (photos, moisture logs).
Call our 24/7 dispatcher for a flooring assessment and samples discussion.
Decide on material class (engineered wood, LVP/LVT, SPC/WPC) based on durability, moisture, and look.
Common Scenarios We Handle
Water-damaged floors replaced after mitigation/dry-down
Slab moisture/RH requiring barriers or adhesive changes
Wavy subfloors needing float/skim or self-leveling underlayment
Acoustic requirements for multi-family/HOA (IIC/STC targets)
Commercial suites needing durable, low-maintenance LVT with clean transitions
Kitchen/bath/laundry installs that demand edge sealing and careful trim

Assessment & Moisture Testing
Check slab/subfloor flatness, hardness, and moisture (RH/CM/MC as applicable); review past mitigation records; select system (engineered wood or LVP/LVT/SPC).
Substrate Prep & Leveling
Remove failing materials/adhesives, grind high spots, fill lows with approved patch/self-leveler, repair squeaks/fasteners, and vacuum to a clean, bondable surface.
Moisture Mitigation & Underlayment
Apply barrier/primer or choose moisture-tolerant adhesive per test results; install acoustic/thermal underlayments where required (IIC/STC/thermal goals).
Layout & Expansion Planning
Snap lines, balance plank widths at walls/doorways, plan transitions, maintain expansion gaps and movement joints per manufacturer and room size.
Installation & Detailing
Install planks (glue/float/nail as specified), roll/press adhesives to coverage, cut around penetrations, set transitions, reducers, stair noses, and seal wet-area edges as specified.
Punch, Clean & Close-Out
Fit base/shoe molding, touch up caulk/paint lines, detail clean, and deliver a close-out packet (product data, maintenance guide, warranty, moisture/flatness records).
What’s Included
Moisture/flatness evaluation with documented readings
Substrate corrections (grind/fill/patch/self-level as needed)
Moisture mitigation / underlayment matched to system and code/HOA needs
Professional installation (engineered wood or LVP/LVT/SPC) per manufacturer
Transitions, base/shoe, and edge sealing where specified
Close-out documents (SKUs, care guide, warranty, test results)
Costs & Timelines (What to Expect)
Typical duration:
300–600 sf living area: 1–3 days depending on prep and material.
Whole-home or commercial zones: 3–7+ days, especially with leveling or adhesive cure times.Cost drivers: Substrate prep (grind/level), moisture mitigation system, material class (engineered wood vs. SPC/LVP), acoustic underlayments, transitions/stairs, and occupied phasing.
Budget clarity: Line-item estimate separating base scope from options (acoustic upgrades, patterns, premium trims).

Insurance & Claims Help
Carrier-ready records: Mitigation photos, moisture logs, and room-by-room scope (remove/replace vs. salvage).
Like-kind vs. upgrades: We separate covered replacement from owner selections (pattern changes, premium species, wider planks).
Supplements: Hidden substrate issues (e.g., high RH, spalling) documented with photos/tests for approval.

Risks of Waiting (Why Act Now)
Residual moisture can warp or cup new floors if not addressed.
Uneven subfloors telegraph through planks, causing hollow sounds and early failure.
Open substrates collect dust/contaminants and increase IAQ complaints.
Lead times for specialty planks/trim extend schedules the longer you wait.

Methods, Materials & Quality Standards
Moisture science: ASTM F2170 (in-slab RH) or equivalent; wood MC within manufacturer limits before install.
Flatness tolerance: Typically ⅛″ in 6′ / 3⁄16″ in 10′ (verify by system); correct with grinding/self-leveling.
Adhesives/underlayments: Manufacturer-approved, moisture-rated when required; acoustic layers meeting HOA/IIC goals.
Expansion & movement: Proper gapping at perimeters, breaks at long runs, and silicone at wet areas where specified.
Stairs & transitions: Rigid nosings, smooth reducers, ADA-aware thresholds in commercial paths.
Site controls: Containment, HEPA air support, clean egress, and daily housekeeping in occupied spaces.
Frequently Asked Questions
Engineered wood vs. LVP—what’s better after a water loss?
LVP/SPC handles incidental moisture better; engineered wood offers a real-wood look with tighter moisture tolerances. We’ll recommend based on your site and goals.
Can you install over existing tile?
Sometimes. We verify flatness/bond, adjust transitions, and confirm manufacturer approval.
Do we need to acclimate materials?
Yes for engineered wood; many SPC/LVP products require temperature stabilization rather than long acclimation—follow label.
Will the floor be noisy in multi-family?
We can meet IIC/STC targets with the right underlayment and assembly—bring HOA guidelines to the consult.
Do you seal edges in kitchens and baths?
Yes—wet-area edge sealing per manufacturer to reduce intrusion risk.
How do we maintain the finish?
We provide a care guide—no steam mops, use pH-neutral cleaners, protect from caster damage, felt pads under furniture.

More White Glove Plumbing Building Restoration Services
Proudly Serving All of Orange County
Address: 1430 E Borchard Ave, Santa Ana, CA 92705
Phone: (949) 209-5206
Email: office@whitegloveplumbingca.com
White Glove Plumbing is locally based in Santa Ana and serves residential and commercial clients across Orange County with 24/7 emergency plumbing and water-damage restoration.
Our expert team handles leak detection, emergency plumbing, water extraction/dry-out, sewage cleanup, mold remediation, and reconstruction in top OC areas including Irvine, Anaheim, Santa Ana, Orange, Tustin, Costa Mesa, Newport Beach, Huntington Beach, Mission Viejo, Lake Forest, Fullerton, Yorba Linda, Laguna Beach, Dana Point, and San Clemente - plus surrounding neighborhoods.
Let’s start a conversation
Book Your Free Consultation call Now
Contact us:
CALL (949) 209-5206
1430 E Borchard Ave, Santa Ana, CA 92705